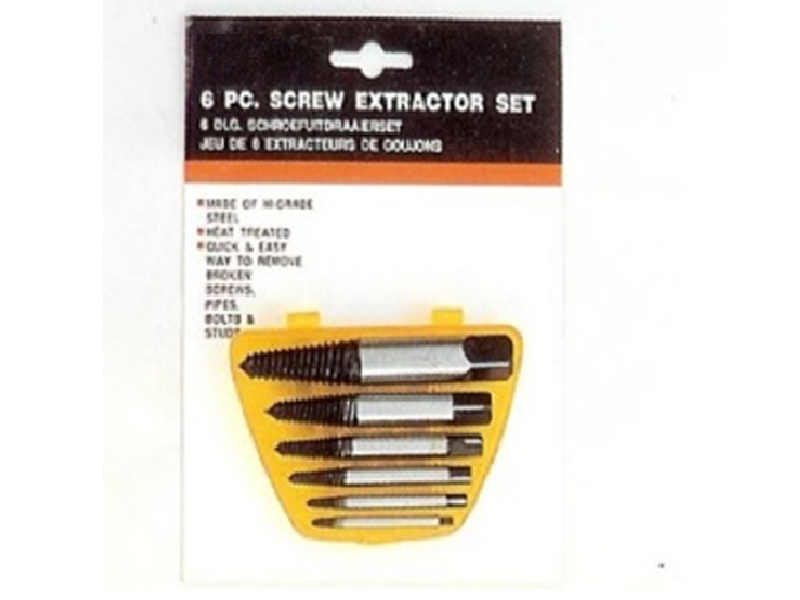
Quick answer: to use a screw extractor set, center-punch the broken or stripped fastener, drill a pilot hole sized to the extractor you are using, insert the extractor and turn it counter-clockwise with a tap wrench or low-speed drill so its reverse-cut flutes bite into the pilot hole wall, then keep turning until the extractor grips and backs the fastener out. Go slowly, keep everything aligned, and never force it — extractors are hard and brittle, and forcing one is the single most common way to snap it off inside the fastener, which turns an easy job into a difficult one.
What a screw extractor set actually is
A screw extractor set is a series of tapered, fluted tools, usually numbered to match a range of fastener sizes, designed to remove screws and bolts whose heads are broken off, stripped, or otherwise impossible to grip with a screwdriver or wrench. Each extractor has a reverse (left-hand) spiral or flute: as you turn it counter-clockwise, the flutes dig into the wall of a pre-drilled pilot hole and the extractor wedges itself tighter the harder it is turned, at the same time driving the stuck fastener out in the same counter-clockwise direction. Sets typically include several sizes so you can match the extractor to the diameter of the fastener you are removing, plus a matching set of pilot drill bit sizes.
Step-by-step: how to use a screw extractor
- Protect yourself first. Wear safety glasses. Drilling and extracting hardened or broken fasteners can throw off small metal shards.
- Center-punch the fastener. Use a center punch and a light hammer strike to make a small indent in the middle of the broken screw or bolt. This keeps the drill bit from wandering off-center when you start drilling.
- Drill the pilot hole. Choose the pilot drill size that matches the extractor you plan to use (most sets list the correct bit for each extractor size). Drill straight down into the center of the fastener at a slow, steady speed — on hardened screws, a sharp cobalt bit and cutting oil reduce heat buildup and bit wear. Drill only as deep as needed to seat the extractor, typically a fraction of the fastener's length.
- Insert the extractor. Fit the extractor into the pilot hole. For hand use, turn it with a tap wrench (a small adjustable handle made for square-shank tools); for power use, chuck it into a drill set to reverse (counter-clockwise) rotation and low speed.
- Turn counter-clockwise and let it bite. Apply steady, moderate downward pressure and turn. The flutes will grip the hole wall; once you feel the extractor "catch," continue turning in the same direction and the fastener will back out with the extractor still seated inside it.
- Back it all the way out. Keep turning until the fastener is fully removed, then unscrew the extractor from the recovered fastener, or discard the fastener if it is being replaced.
Extractor set sizing at a glance
| Situation | Recommended approach |
|---|---|
| Fastener size unknown or badly damaged | Start with the smallest extractor that could plausibly fit; a hole can always be enlarged, but an oversized pilot hole cannot be undone |
| Extractor does not bite on first attempt | Drill the pilot hole slightly deeper or wider (often 1/16" / ~1.5 mm is enough) and try again — do not force the same attempt harder |
| Fastener is hardened steel | Use a cobalt bit, cutting oil, and very low drill speed to control heat; consider a spot of penetrating oil around the fastener first |
| Extractor will not turn further | Stop immediately — do not force it. Re-check alignment and pressure rather than adding torque |
Safety notes: extractors are hard and brittle
Screw extractors are made from hardened tool steel so their flutes can bite into steel that has already defeated a screwdriver or wrench. That same hardness makes them brittle: unlike a drill bit, an extractor is not designed to flex, and applying excessive torque, side-loading it, or trying to power through resistance with a high-speed drill is the most common way to snap the tip off inside the fastener. A broken extractor is a serious setback, because it is itself extremely hard and very difficult to drill out.
To avoid that outcome: match the extractor size to the fastener as closely as the set allows, keep the tool square to the pilot hole at all times, use a slow, steady turning speed rather than a fast drill, and stop the moment you feel unusual resistance rather than pushing through it. If an extractor does break off flush or below the surface, the practical options are to try to grip any exposed tip with fine pliers, carefully grind or drill around the broken piece with a hardened-metal bit, or take the part to a machine shop — prevention through correct technique is far easier than any of these recovery methods.
A useful trick: left-hand drill bits
Many technicians drill the pilot hole with a left-hand (reverse-cutting) drill bit instead of an ordinary bit. Because the bit cuts while spinning counter-clockwise — the same direction needed to loosen the fastener — it occasionally catches the remaining threads and backs the fastener straight out during drilling, before the extractor is ever needed. It does not always work, and it is not a substitute for a proper pilot hole if the fastener does not back out on its own, but it costs nothing to try first and can save a step. If the fastener has not moved by the time the pilot hole reaches the correct depth for your extractor, simply continue with the extraction steps above.
Source screw extractor sets from the manufacturer
Transtime Tools manufactures a 6-piece screw extractor set sized to cover a broad range of broken and stripped fastener sizes for workshop and industrial use. If you are an importer, distributor, or industrial buyer and need sizing charts, material specifications, or OEM packaging, request a quote or contact our team — we are happy to help you match extractor sizes to your application.